This is a project that I’ve been looking forward to working on for a long time! Thankfully by the time I finally got around to it, most of the messy stuff has been worked out by other people and throwing this together was actually pretty easy… 😉
Ever since I realized that my wife and I could share a calendar via Google, it seemed like a no-brainer to help keep me on the same page because I’m the one who can never keep track of doctor’s appointments and all of the random stuff that we’ve got going on for the family throughout the month. The thing is, Google Calendar is great when I’m on the go and just want to check something on my phone real quick, but when I’m at home, I still like the simplicity of a wall calendar hanging in the kitchen or my office to be able to see at a glance if we’ve got anything going on that week.
The solution is actually pretty simple:
- one old computer display (I picked this 22″ Dell up at a used monitor sale for $10)
- one Raspberry Pi (I’m using the zero model because barely any CPU is needed here)
- one free account on DAKboard.com
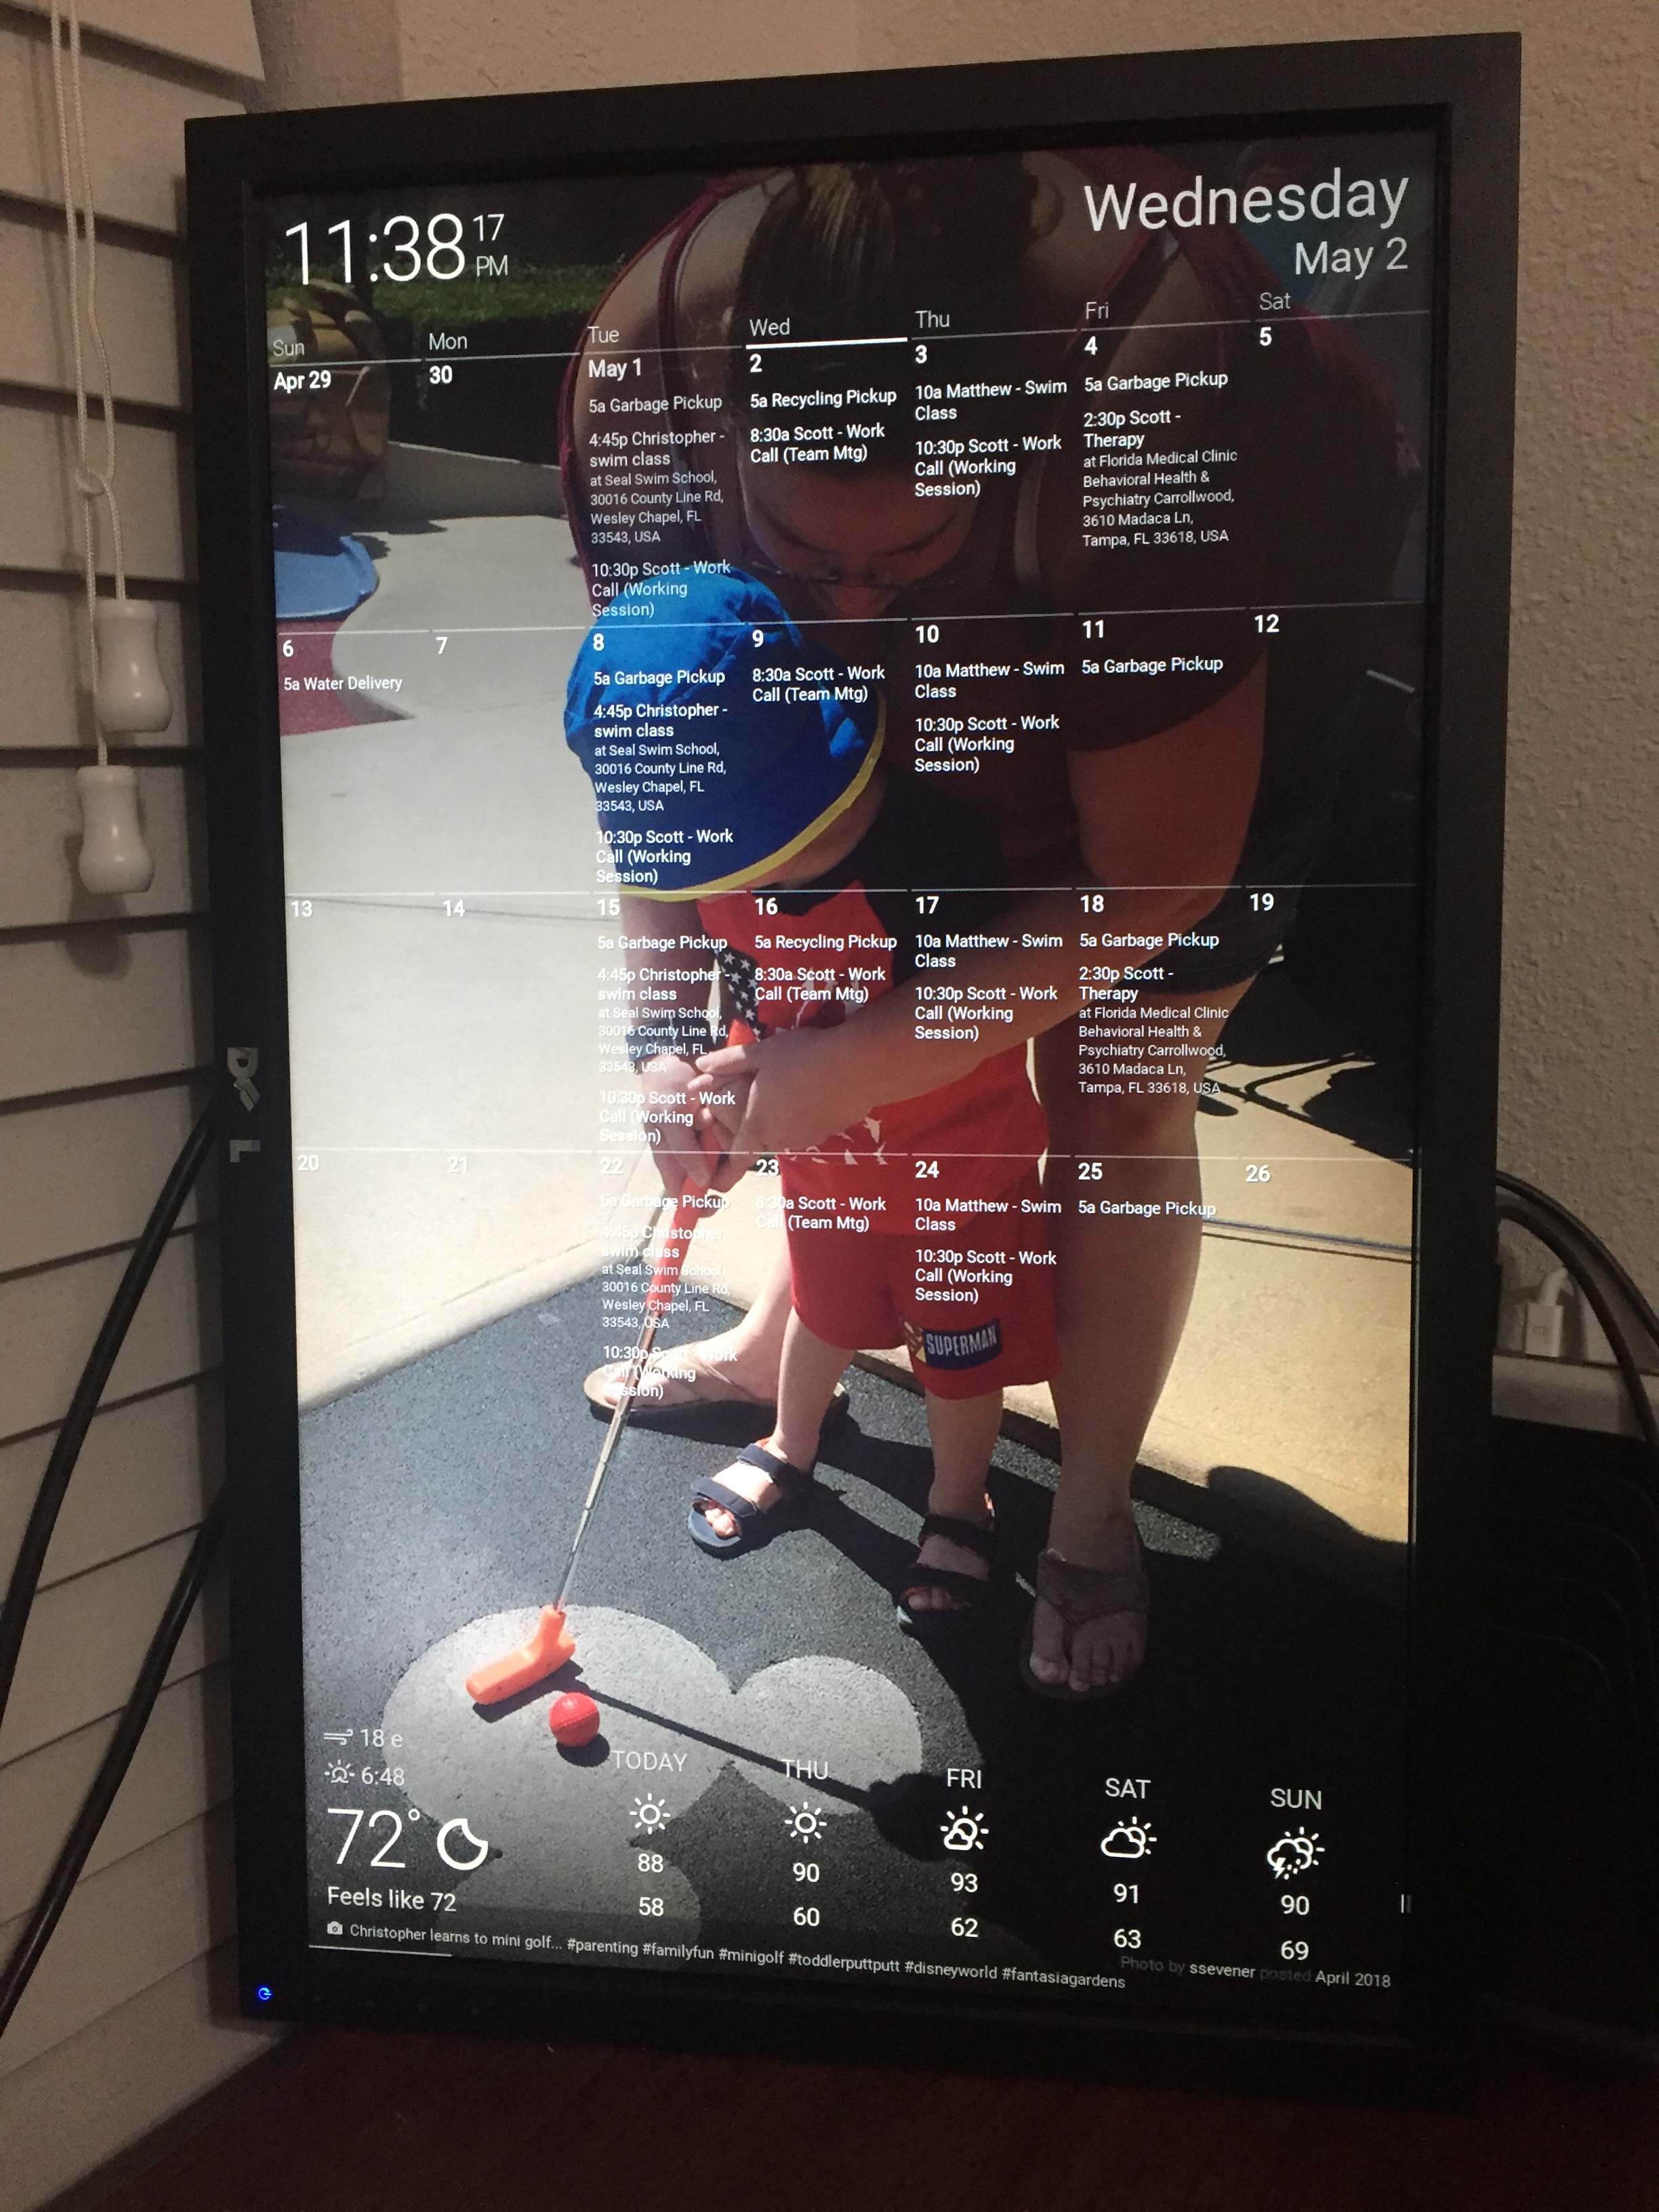
What’s cool is when I originally thought about doing this, I figured I’d have to create a custom page and embed the calendar from Google in it, and then host that locally on the Pi along with any photos that I wanted to incorporate into some sort of slideshow, but instead the DAKboard folks have done all of that heavy lifting for me by creating a web service that pulls in calendar info using iCal, as well as weather data, news via RSS feeds, even a to-do list from Todoist, plus background images from sites like Instagram and Flickr!
I literally fought with my Raspberry Pi for two days because I got a bad USB dongle in my order and couldn’t get it to recognize a keyboard/mouse, and then setup the calendar itself using DAKboard’s features in about 20 minutes.
The display is just a full screen Chromium browser pointed at the Private URL that DAKboard gives you.
I added one line of code to the Pi’s config.txt file to rotate the screen to better resemble a wall calendar.
Now pretty much all I have left is to modify the startup script to have it automatically load Chromium and go right to that URL, install a script to make the cursor disappear on inactive, and then figure out how to hang the thing on the wall!
(and luckily, DAKboard has a neat-o blog post that details pretty much all of this stuff!)
It’s kind of surprising how quickly this much came together once I actually started – I do have a wishlist, but it’s admittedly pretty small…
- Incorporate a motion sensor that will put the screen to sleep once everyone goes to bed (no idea how to do this)
- Incorporate some sort of controls to allow flipping between months (my wife insists that this is vital to completely replace our paper calendar)
- Create a separate photo account specifically for calendar photos (because it’s neat to link to Instagram, but I take pictures of dumb stuff sometimes that doesn’t belong on our family calendar!)
- Support for more than one screen (I think DAKboard right now only supports one and I can see having different layouts for kitchen vs office, etc…)
- Hide the power cords once this is mounted to the wall (it’s going to be a pain, but I basically just need to install a new outlet wherever the calendar will go)
I suppose I should point out that DAKboard’s business is actually in selling a retail version of this where everything is done for you, though they didn’t pay me to write this post … but I’d be happy to write a review if they want to send me a free unit to try out! 😉
Theirs is still a little pricey – $299 for a 24-inch display, whereas mine will likely still be less than $75 even after I pick up a wall mount for it.
Hopefully the price will come down, though, as displays continue to get cheaper. I see it as an alternative to the digital picture frame craze that we had a few years ago, but thankfully with a much larger display! With everything else so dynamic and connected around us, it seems weird to still be penciling in appointments on a piece of paper hanging on the wall, and at least this is still cheaper than hanging a full-fledged iPad to fulfill that coveted touch capability. 😀
If I was buying a monitor specifically for this, I’d aim for a slightly newer one with built-in USB (to eliminate a power cable for the Pi) and HDMI (to avoid an extra adapter from DVI to HDMI to micro HDMI), but you really don’t need much … I’m pretty sure you can still get displays like that in the neighborhood of $100.
I’ll be sure to post something else if/when I figure out all of that trickier stuff, but for now I’m pretty satisfied!